Do you face trouble changing WordPress email id from the WordPress dashboard? In this article, we will show you how to easily change the WordPress admin email.
When you update the email ID from the WordPress admin dashboard, WordPress gives you a message that says “There is a pending change of your email and you never receive the confirmation email in your mailbox.
Why changing the WordPress admin email is important?
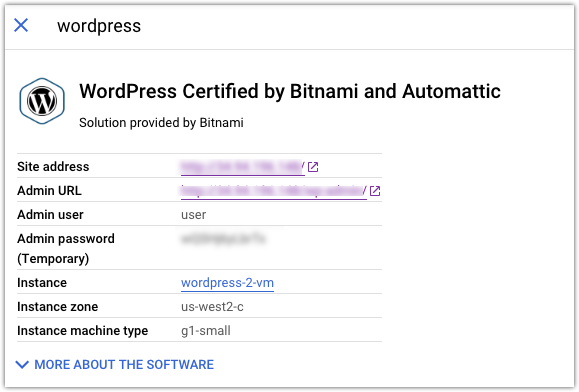
WordPress uses the default user@example.com as the admin email. (Note this is only for WordPress Bitnami hosted on Google Cloud Platform).
The admin email address is used by WordPress as the website’s email address and this is used to send important email notifications related to your WordPress account.
You may also need to update this default email address to configure mail setting in WordPress.
The admin user’s email address is used to recover the lost password. So, take this as a priority when you install WordPress in Google Cloud.
The first step is to enable PHPmyadmin and then update the email address in the database.
If you try to access PHPMyAdmin followed by your URL (http://example.com/phpmyadmin) you will get the following note.
For security reasons, this URL is only accessible using localhost (127.0.0.1) as the hostname.
To enable PHPMyAdmin follow the below steps.
Step 1 . Login in to Cloud Console through SSH.

Step 2 Edit the httpd-app conf file
Type the below command and press enter
sudo nano /opt/bitnami/apps/phpmyadmin/conf/httpd-app.confSearch for the below line of text as highlighted in the below image.

Now, you need to replace these lines with the below lines of code.
<IfVersion < 2.3 >
Order allow,deny
#Allow from 127.0.0.1
 Allow from all
Satisfy all
</IfVersion>
<IfVersion >= 2.3>
#Require local
 Require all granted
</IfVersion>
The final result should look like this.

Press ^X to save and exit from the console.
Restart apache server by typing the below command.
sudo /opt/bitnami/ctlscript.sh restartStep 3 Update the user email and admin email in PHPMyadmin
To update the email admin email ID login to PHPMyAdmin from the browser. To login in type your domain name followed by a ‘/’ and phpmyadmin.
For example, if your domain name is www.example.com then type www.example.com/phpmyadmin.
The default username is “root” and the default password is the one with which you have initially logged into the WordPress dashboard. You can also find the password. in the Google Cloud Deployment Settings.

Step 4 Update User login details in wp_users table.
Once logged in, click on bitnami_wordpress to expand the tables.
Then, click on wp_users.
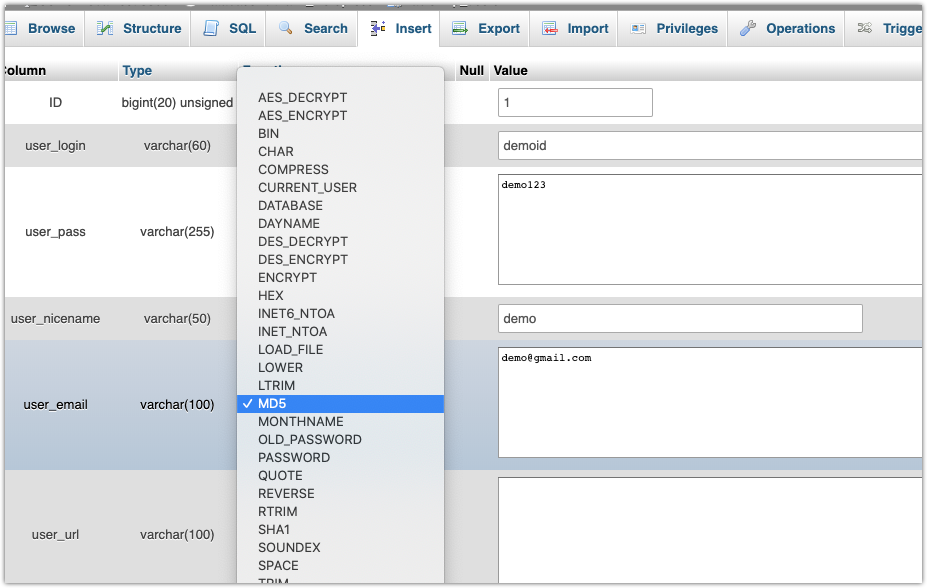
Update, user_login with a username with which you want to login to WordPress, user_nickname and user_email with your email id.

You will also need to update the password in the MD5 format.
To update your password, select the row and click on the EDIT icon.
Enter your password in plain text in the password field, then select MD5 option from the dropdown menu under function.

Click on Go to save the changes.
Step 5: Update admin email ID in the wp_options table
The last and final step is to update your email ID as the admin email ID. To do this, follow the below steps.
Click on Wp_options table and replace the default admin email to your email id.

Now, login to your WordPress dashboard with the user id and password entered in the wp_users table. You will be able to see your email id and username.

You may change back the code created in step 2 to default and disable Phpmydamin login for security.

Leave a Reply