In this article, I will show you how to remove Bitnami Banner that appears on the lower right corner of your WordPress site after installing WordPress on Google Cloud Platform. This is fairly an easy 5 step process to follow.
To remove the Bitnami banner logo from WordPress hosted on Google Cloud Platform follow the below steps.
STEP 1: Log in to your WordPress Instance
SSH Login to your Google Cloud Platform.

STEP 2: Go to the required directory
cd is the command, you have to use to navigate to the required directory.Copy the below code in the terminal and then hit Enter.
cd /opt/bitnami/apps/wordpress/conf
STEP 3: Open the required file for editing
To remove bitnami banner, you need to edit the httpd-app.conf file. Type the below command and hit Enter.
sudo nano httpd-app.conf
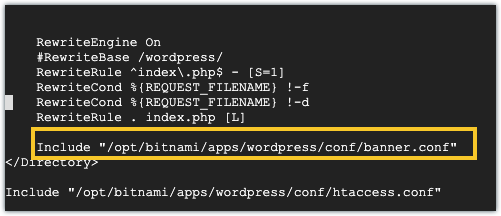
Now, you need to find the the below line in the file.
Include "/opt/bitnami/apps/wordpress/conf/banner.conf"

STEP 4: Comment the banner.conf file
Once, you have found the line mentioned in Step 3, you can go ahead and comment the line by providing a “#” symbol before the line or you can also remove the line.
#Include "/opt/bitnami/apps/wordpress/conf/banner.conf"
STEP 5: Restart Apache Server
Restart Apache by typing the below command for the changes to take effect.
sudo /opt/bitnami/ctlscript.sh restart apache
That’s it! You will no longer see the Bitnami banner in your WordPress website.

Leave a Reply